Tech
Terraform-GCP-K8s: A Jenkins DevOps story
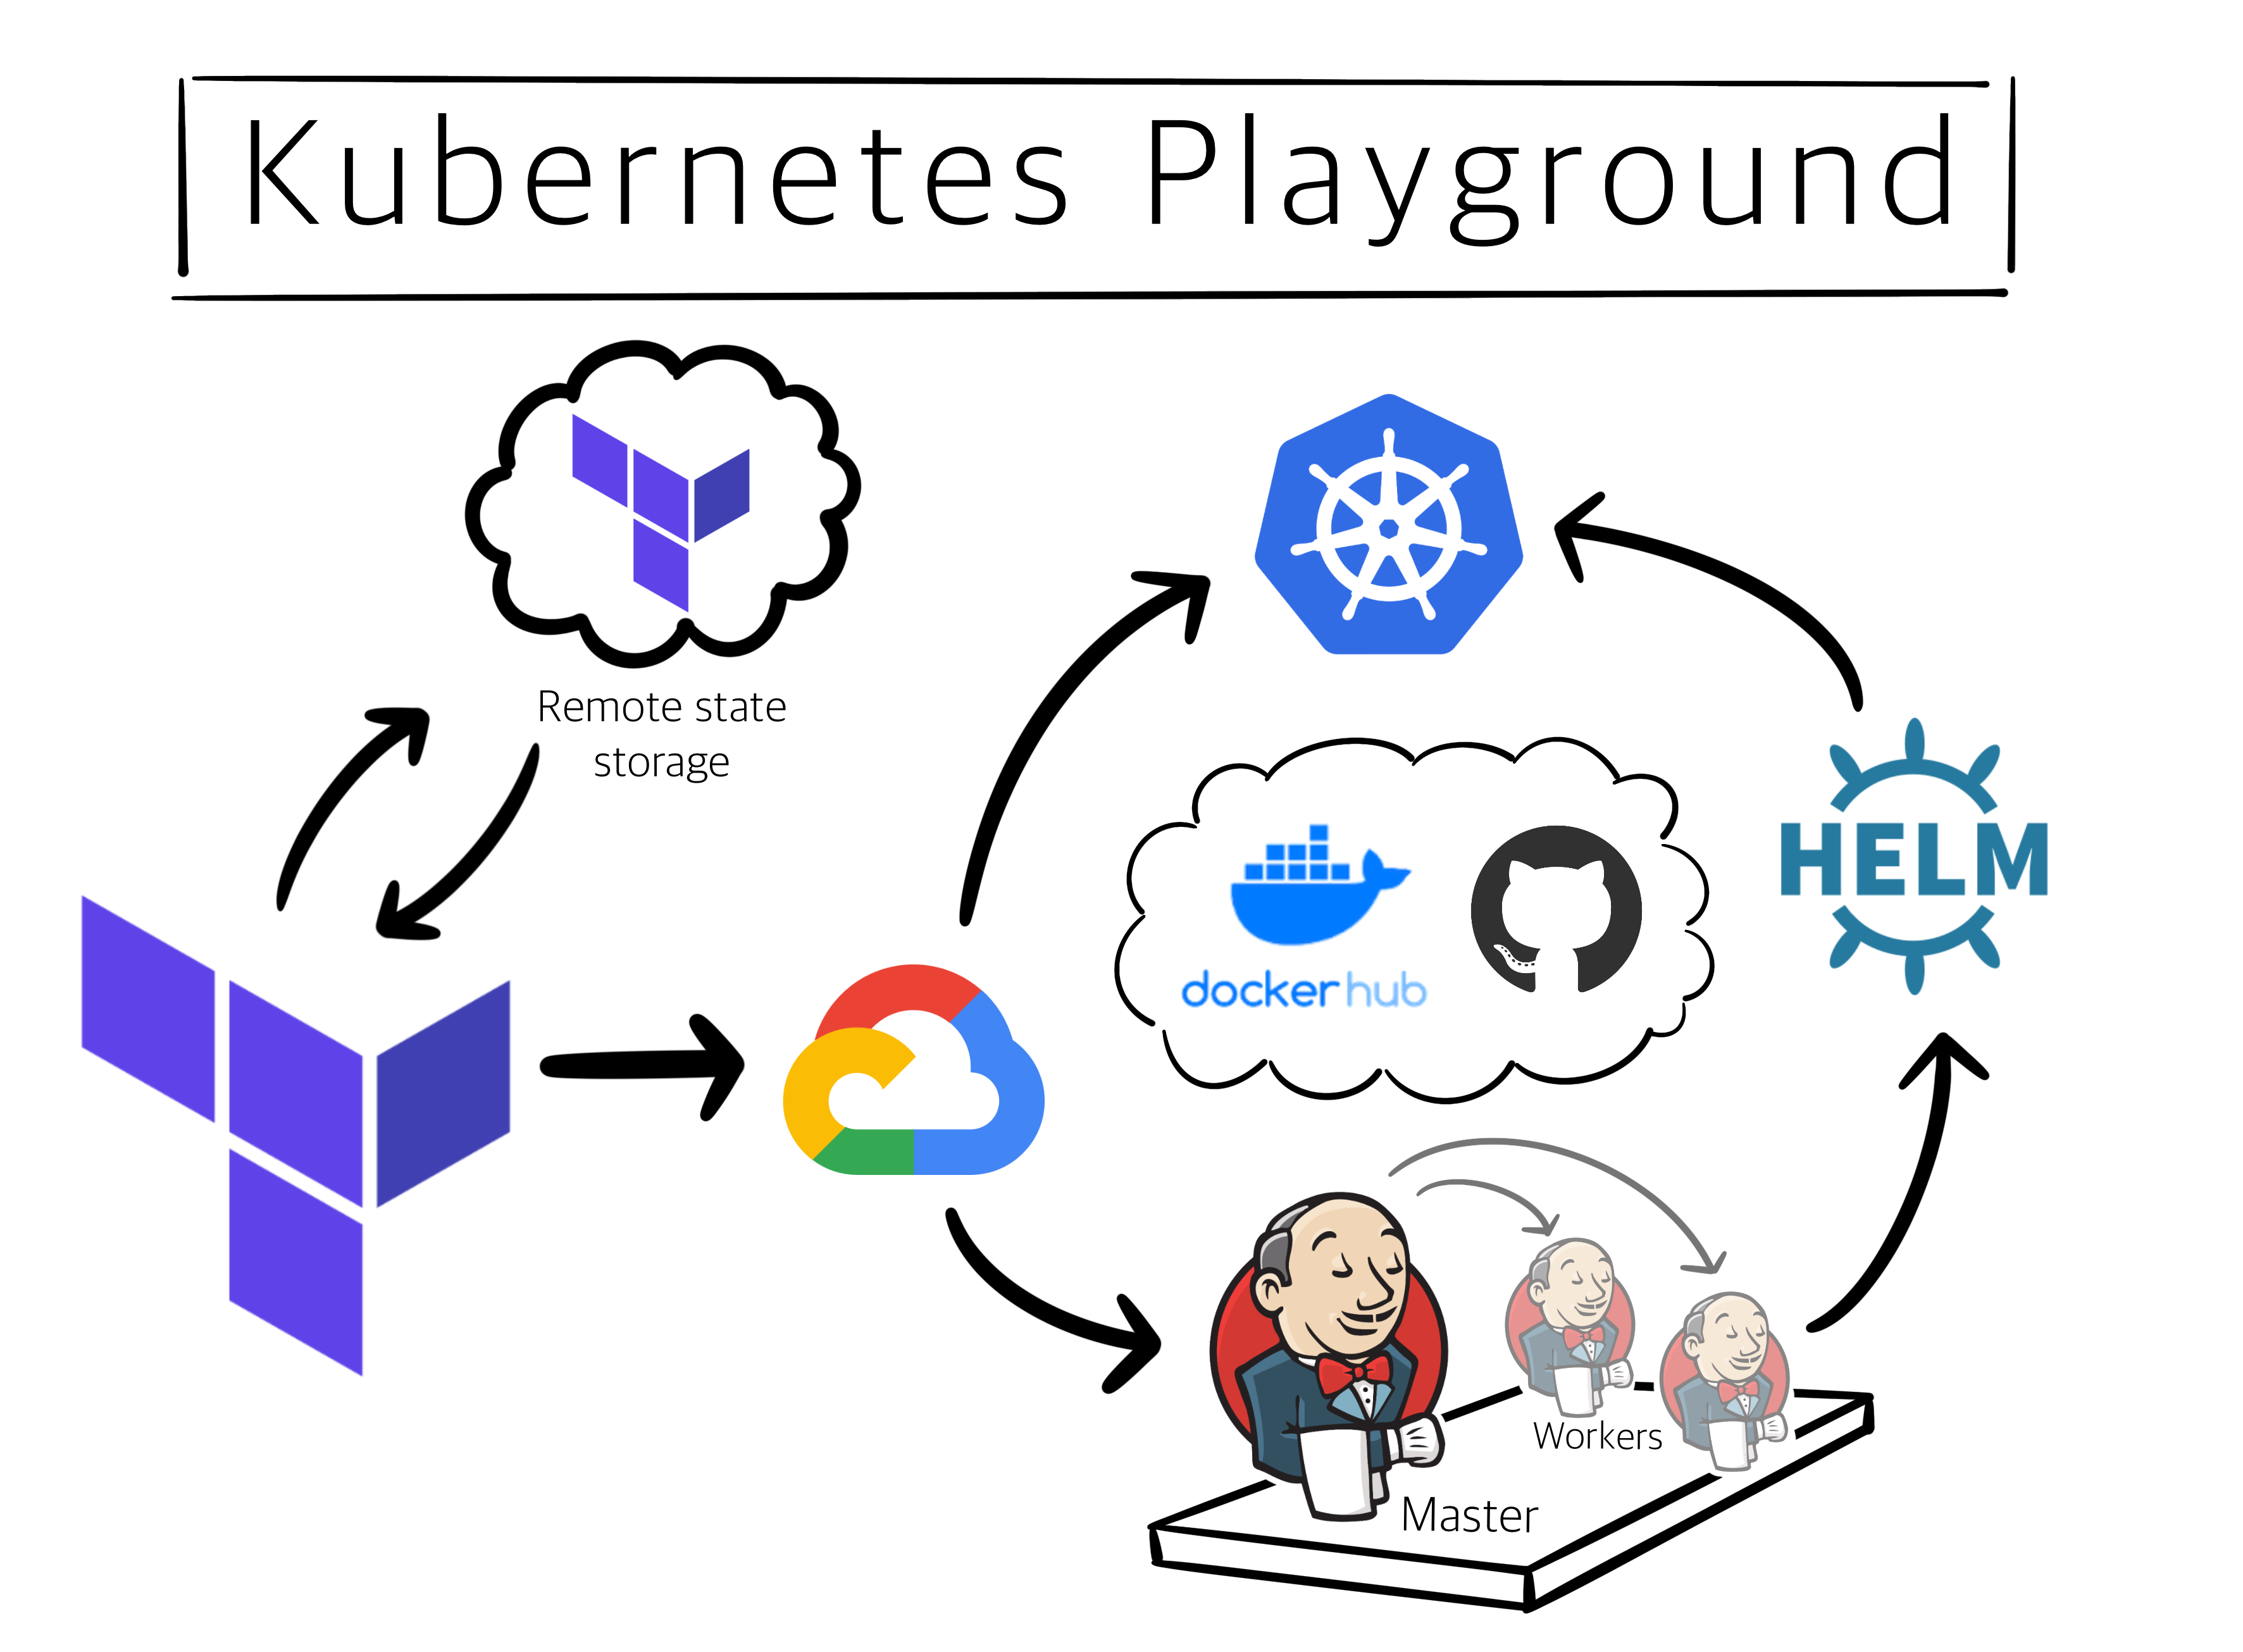
In this post we are going to bootstrap a disposable Kubernetes cluster in Google Cloud Platform using Terraform. Once we have the cluster ready, we will use a Docker based ephemeral Jenkins Configuration as Code node to setup a pipeline to deploy Helm packages into our cluster. We’ll call it the K8s Playground.
This write-up assumes you have a basic idea about these tools. This is what we-re building-
Things you’ll learn-
- How to use Terraform Cloud as a remote state store.
- How to provision an auto-scaling Kubernetes cluster managed by Google.
- How to create a Jenkins master-worker setup using JCasC and Docker Cloud.
- How to deploy components to a Kubernetes cluster using Helm.
Code for this project-
Registries for this project-
The GCP resources required for this exercise exceed the free tier. At the time of writing this post, as a first time customer you’d get $300 free credits to explore Google cloud.
Let’s begin the Setup
Terraform Cloud
- Please follow the official guide to install Terraform on your computer.
- Go to Terraform Cloud and create an organization. Our workspaces will be a part of this organization.
- Go to User Settings -> Tokens -> Create an API Token. Copy and securely save this token for the next step.
- Follow the official guide to create a file named
.terraformrc. (name may change depending on your OS - follow the guide for this). Add the token generated in the previous step to this file
# .terraformrc
credentials "app.terraform.io" {
  token = "xxxxxx.atlasv1.zzzzzzzzzzzzz"
}
- Create an environment variable
TF_CLI_CONFIG_FILEpointing to the .terraformrc file location.You must never share this file or publish it to a Git repo. This is a secret and must be stored securely. - Select your organization from top left drop-down and create a new workspace of
CLI-driven workflowtype. - Click on the workspace and go to Settings -> General, and select
Localas theExecution Mode. This will make sure that the Terraform plans run on your local machine and the states are stored in Terraform cloud. The connection will be authenticated by the API token for your registered user we created in previous steps. - The main benefit of storing states in a remote backend will be the centralized single source of truth. Read more here.
Google Cloud
- In this exercise we will be interacting with the GCP infrastructure using declarative HCL code and we will be making requests against the Google Cloud API so we will not be installing Google Cloud SDK.
- Create two new projects (
Test-ClusterandTest-VM) in Google Cloud. - Go to Identity -> Service Accounts and create a Service Account called
Terraformand you can addTerraform CLIto Service Account Description. - Assign
Project Editorrole to the service account or a more restrictive access per your needs. You need this account to be able to create and destroy Google Cloud resources. - Create and download
*.jsoncredentials key, and store it in a secure location. Make sure you set an environment variable pointing to GCP secret token, something likeexport TF_VAR_credentials=/path/to/GCP-key.json. This is another secret, please make sure this is never shared and is always accessed via an environment variable or a secure Ansible/ Hashicorp Vault. This token will be used by Terraform to authenticate your requests against GCP API.
Terraform-GKE
Let’s start with a simple environment variables list which must be sourced every time before running a Terraform command. As a quick hack you can always create an alias Terraform="source env.sh && terraform" to operate automatically. I also never store env.sh in a Git repository, I create symlinks inside my project pointing to securely stored env.sh along with a .gitignore. If you don’t like polluting your environment variables, there are better ways of handling secrets like Hashicorp Vault or Ansible Vault. Encrypted or not, sharing your secrets is still NEVER recommended.
# env.sh
export TF_VAR_credentials="/path/to/gcp-project-key"
export TF_VAR_project="gcp-project"
export TF_VAR_region="gcp-region"
export TF_VAR_zones='["gcp-region-a", "gcp-region-b"]'
export TF_CLI_CONFIG_FILE="/path/to/Terraform-CLI-Configuration-File"
export TF_VAR_kubeconfig="/path/to/kubeconfig"
Here Google project and credentials variables here must be pointing to Test-Cluster project you created earlier.
# .gitignore
add_disk/disk*
.dockerignore
.DS_Stor*
env.sh
.gitignore
.helmignore
kubeconfig
.terraform/
terraform.tfvars
We will not be making use of all these variables in this project. All variables prefixed with TF_VAR_ are going to be picked up and used by Terraform as long as they are declared in a variables.tf
# var.tf
variable "project" {
  type = string
}
variable "region" {
  type = string
}
variable "credentials" {
  type = string
}
variable "cluster_name" {
  type = string
}
variable "machine_type" {
  type = string
}
variable "initial_node_count" {
  type = string
}
variable "kubeconfig" {
  type = string
}
variable "oauth_scopes" {
  type = list(string)
}
variable "min_node_count" {
  type = string
}
variable "max_node_count" {
  type = string
}
I like to maintain a separate file for default definitions
# vars.auto.tfvars
username = {}
password = {}
cluster_name = "k8s-playground"
machine_type = "n1-standard-1"
initial_node_count = 1
oauth_scopes = [
        "https://www.googleapis.com/auth/compute",
        "https://www.googleapis.com/auth/devstorage.read_only",
        "https://www.googleapis.com/auth/logging.write",
        "https://www.googleapis.com/auth/monitoring",
        "https://www.googleapis.com/auth/service.management.readonly",
        "https://www.googleapis.com/auth/servicecontrol",
        "https://www.googleapis.com/auth/trace.append"
    ]
min_node_count = 3
max_node_count = 100
Note that secret variables have not been defined in .auto.tfvars file, because their values will be assigned by TF_VAR_ environment variables. Now to the main file
# main.tf
# Remote State
terraform {
  required_version = "~>0.12"
  backend "remote" {
    organization = "Singhventures"
    workspaces {
      name = "K8s-GKE"
    }
  }
}

# Random unique username and password
resource "random_id" "username" {
  byte_length = 14
}

resource "random_id" "password" {
  byte_length = 18
}

# Variables
variable "username" {}
variable "password" {}

# GKE
module "cluster-kubeconfig" {
    source  = "janpreet/cluster-kubeconfig/google"
    username = random_id.username.hex
    password = random_id.password.hex
    project = var.project
    region = var.region
    credentials = var.credentials
    kubeconfig = var.kubeconfig
}
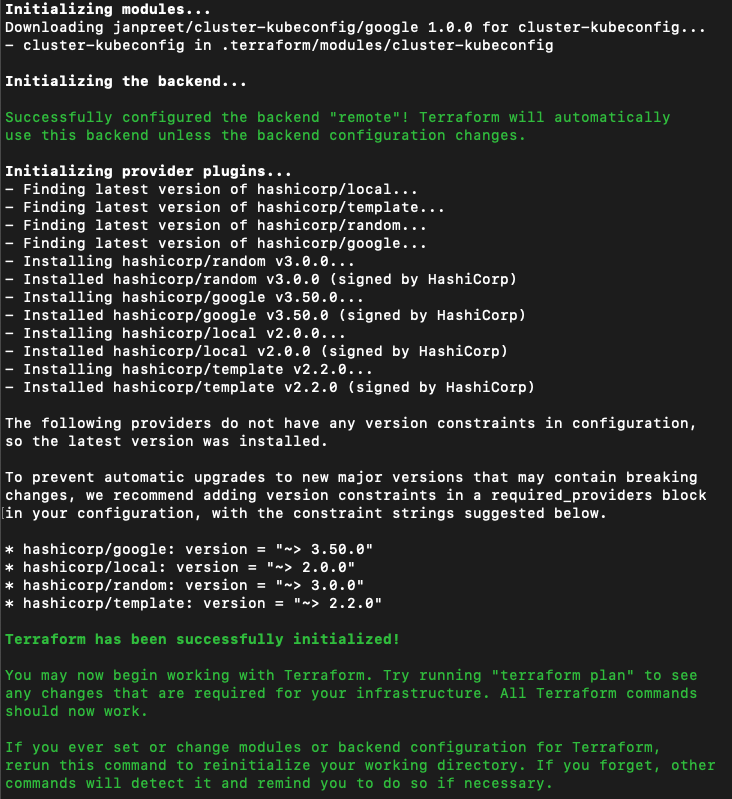
The first block configures Terraform to use a remote backend to store states authenticated by TF_CLI_CONFIG_FILE. I’m using a custom module here janpreet/cluster-kubeconfig/google because Terraform’s google-container-cluster does not have a straight-forward way of exposing a Kubeconfig for your cluster. The variable var.kubeconfig is going to be the path where you’d like to store the kubeconfig, defined as a Terraform environment variable. If you quickly want to see this in action you may just; clone Terraform-GKE repo, change variables, organization name and workspace name to your match your setup, source environment variables, and run Terraform init to initialize Terraform modules and providers in your working directory. Your output should look like this.
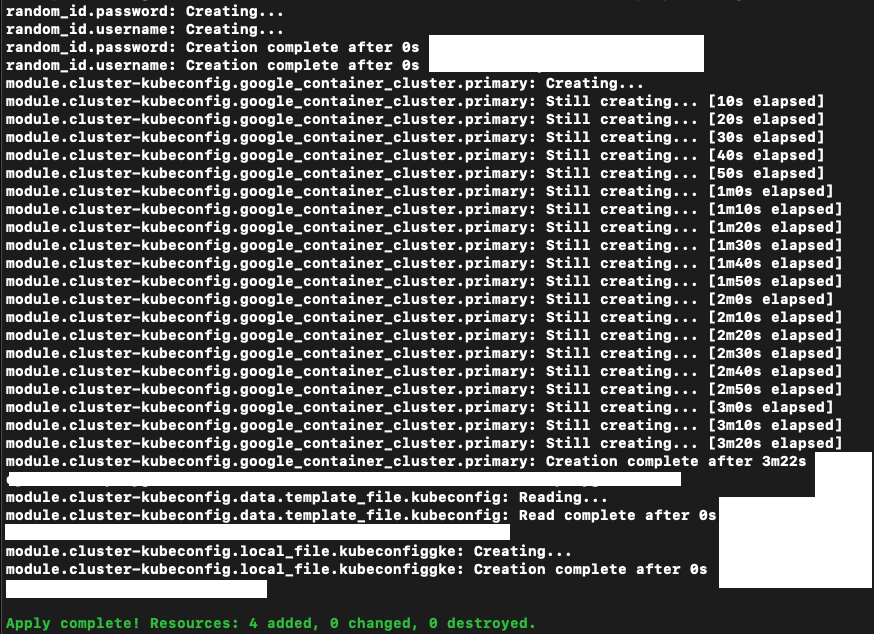
 Now go ahead and run
 Terraform plan to read about what your infrastructure would look like. If you’re satisfied, you may run Terraform apply to create the infrastructure, you’d want to follow the prompt, and at the end this would be the result.
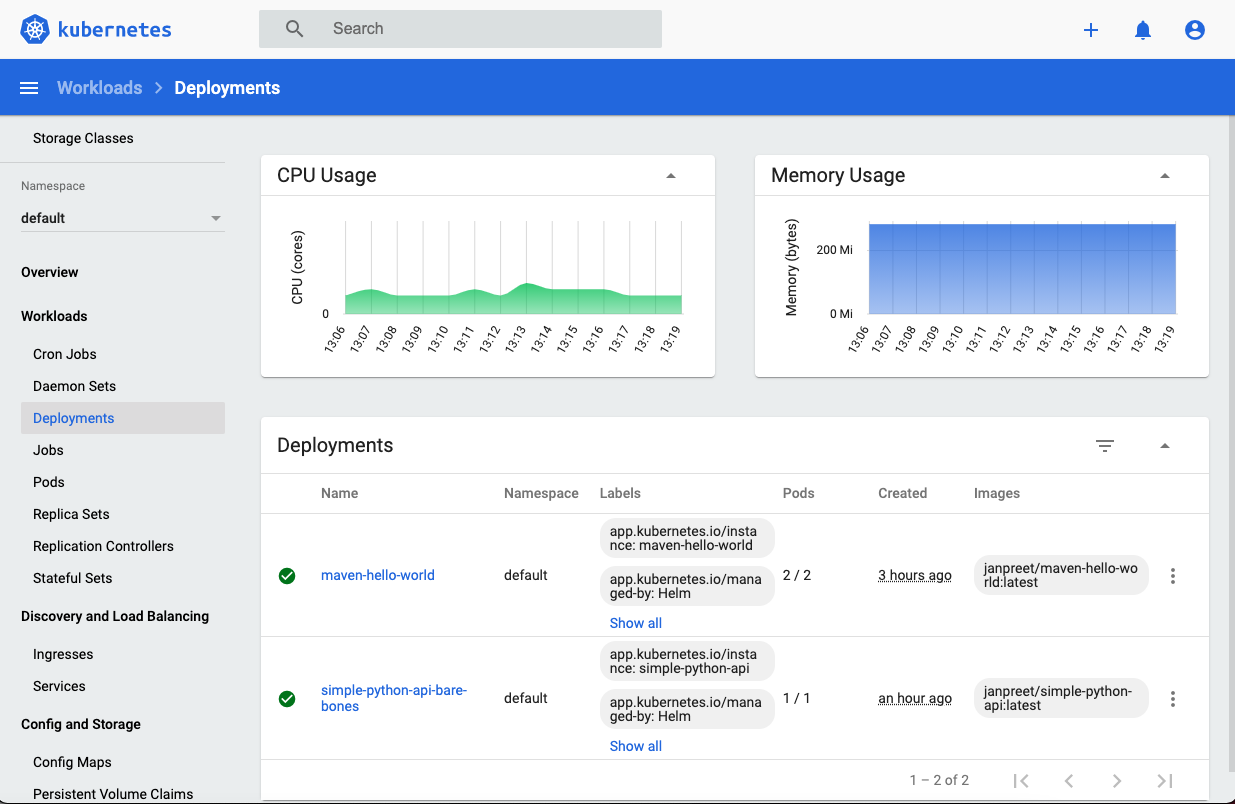
Go to Google Cloud Console -> Select your project Test-cluster -> Compute Engine -> VM Instances, you can see the worker nodes. If you select Kubernetes Engine from the navigation menu, you can learn about your cluster and explore the Google managed dashboard.
Terraform-GCP-Jenkins
We’ll deploy our Jenkins container on a VM. Let’s do the following-
- Add a second workspace having
CLI-driven workflowwithExecution Modeset asLocalto your organization in Terraform Cloud for storing the Terraform states of our new VM. - Repeat the service account setup for our second Google cloud project
Test-VMwe created earlier and securely export the JSON key. - Clone Terraform-GCP-Jenkins.
Here Google project and credentials variables must be pointing to Test-VM project. Which requires you to maintain two different collection of Terraform environment variables.
# env.sh
export TF_VAR_credentials="/path/to/gcp-project-key"
export TF_VAR_project="gcp-project-name"
export TF_VAR_region="gcp-region"
export TF_VAR_zones='["gcp-zone-1", "gcp-zone-2"]'
export TF_CLI_CONFIG_FILE="/path/to/Terraform-CLI-Configuration-File"
export TF_VAR_diskNameFile="" #Name of the new mountable persistent disk
export TF_VAR_jenkins_storage_uuid="" #UUID of the new mountable persistent disk
export TF_VAR_mnt_drive_id="/path/to/mountable-drive/" #From lsblk
export TF_VAR_github_admin_password=""
export TF_VAR_github_admin_user=""
export TF_VAR_jenkins_admin_user=""
export TF_VAR_jenkins_admin_password=""
export TF_VAR_kubeconfig="/path/to/kubeconfig"
export TF_VAR_dockerhub_admin_password=""
export TF_VAR_dockerhub_admin_user=""
We would be creating a single VM to host our Master Jenkins in a container. For that we would be using a Container Optimized image for the VM cos-cloud/cos-stable-69-10895-71-0. You’ll find these details in vars.* files. It is important to note that you may choose to create your own image using a tool like Packer.
To make our Jenkins setup truly ephemeral we require it to behave exactly the same every time it it re-created. For that Terraform would be rendering this template as Jenkins.yml and feeding it to the VM
# jenkins.yml.tpl
jenkins:
  systemMessage: "\n\nHi. This Jenkins is configured automatically by Jenkins Configuration as Code plugin.\n To create a new job or a pipeline, please push the Jenkinsfile as a separate remote branch to https://github.com/janpreet/Jenkins-Job-DSL.\n\n"

  numExecutors: 3
  mode: NORMAL
  scmCheckoutRetryCount: 5
  labelString: "master"

  securityRealm:
    local:
      allowsSignup: false
      users:
      - id: ${j_admin_user}
        password: ${j_admin_password}

  clouds:
    - docker:
        dockerApi:
          dockerHost:
            uri: "unix://var/run/docker.sock"
        name: "docker"
        templates:
        - connector: attach
          dockerTemplateBase:
            cpuPeriod: 0
            cpuQuota: 0
            image: "janpreet/jenkins-slave"
          labelString: "all-in-one"
          name: "docker-slave"
          pullStrategy: PULL_ALWAYS
          remoteFs: "/home/jenkins"

  crumbIssuer:
    standard:
      excludeClientIPFromCrumb: false

  disableRememberMe: true

  authorizationStrategy:
    globalMatrix:
      permissions:
        - "View/Read:authenticated"
        - "Job/Read:authenticated"
        - "Job/Build:authenticated"
        - "Job/Discover:authenticated"
        - "Job/Workspace:authenticated"
        - "Job/Cancel:authenticated"
        - "Run/Replay:authenticated"
        - "Run/Update:authenticated"
        - "Overall/Read:authenticated"
        - "Overall/Administer:${j_admin_user}"

  remotingSecurity:
    enabled: true

tool:
  git:
    installations:
      - name: git
        home: /usr/bin/git
  dockerTool:
    installations:
    - name: docker
      properties:
      - installSource:
          installers:
          - fromDocker:
              version: "latest"

credentials:
  system:
    domainCredentials:
      - credentials:
        - usernamePassword:
            scope: "GLOBAL"
            id: "github-user"
            description: github username/password
            username: ${gh_admin_user}
            password: ${gh_admin_password}
        - usernamePassword:
            scope: "GLOBAL"
            id: "dockerHub-user"
            description: "Docker Hub User Credentials"
            username: $${dh_admin_user}
            password: ${dh_admin_password}
        - usernamePassword:
            scope: "GLOBAL"
            id: "jenkins-admin"
            description: "Jenkins Admin Credentials"
            username: $${j_admin_user}
            password: ${j_admin_password}
        - file:
            description: "K8s Kubeconfig"
            fileName: "kubeconfig"
            id: "kubeconfig"
            scope: GLOBAL
            secretBytes: ${secretBytes}

jobs:
  - script: >
      multibranchPipelineJob('Jenkins-Job-DSL') {
          branchSources {
              git {
                  id = 'Jenkins-Job-DSL'
                  remote('https://github.com/janpreet/Jenkins-Job-DSL.git')
              }
          }
      }

unclassified:
  location:
    url: "${j_url}"
    adminAddress: janpreetsinghgill@gmail.com
Where the startup script will handle it (along with the Kubeconfig), mount a directory and tell Jenkins where to look for the coded configuration file by setting CASC_JENKINS_CONFIG="/var/jenkins_home/jenkins.yml".
As the last step in provisioning our VM, Terraform would be running this startup script, to complete setting up the Jenkins Master container-
# master.sh.tpl
sudo mkdir /var/jenkins_home
sudo chmod -R 777 /var/jenkins_home
sudo echo "export KUBECONFIG=/var/jenkins_home/kubeconfig" >> /etc/bash/bashrc
sudo usermod -a -G root $USER
sudo chmod 777 /var/run/docker.sock
JENKINS_IMAGE="janpreet/jenkins-with-docker"
sudo docker pull $JENKINS_IMAGE
sleep 30
sudo mv ${jenkins_upload}/jenkins.yml /var/jenkins_home/jenkins.yml
sudo mv ${jenkins_upload}/kubeconfig /var/jenkins_home/kubeconfig
sleep 30
sudo docker run -d -p 8080:8080 -p 50000:50000 -v /var/jenkins_home:/var/jenkins_home -v /var/run/docker.sock:/var/run/docker.sock -v /usr/bin/kubectl:/usr/bin/kubectl --env JAVA_OPTS="-Djenkins.install.runSetupWizard=false" --env CASC_JENKINS_CONFIG="/var/jenkins_home/jenkins.yml" --name master $JENKINS_IMAGE
sudo source /etc/bash/bashrc
It is important to note that, our secrets so far have been handled by Terraform environment variables. Sky is the limit when it comes to codifying your configuration.
If you’re satisfied with your definitions of Terraform environment variables for this project, you may Terraform init, Terraform plan and then Terraform apply to create the VM. On Google Cloud Console, you can go to the VM project Test-VM -> Compute Engine -> VM Instances, to see the newly created VM.
In our master script, while creating the container we are telling VM Docker engine to map incoming requests at port 8080 with container port 8080 which will be served by the Jenkins service. That means we are now ready to access our Master Jenkins at <Google Cloud VM's External IP>:8080. Login to your Jenkins using Jenkins username and password you’ve defined in TF_VAR_jenkins_admin_user and TF_VAR_jenkins_admin_password.
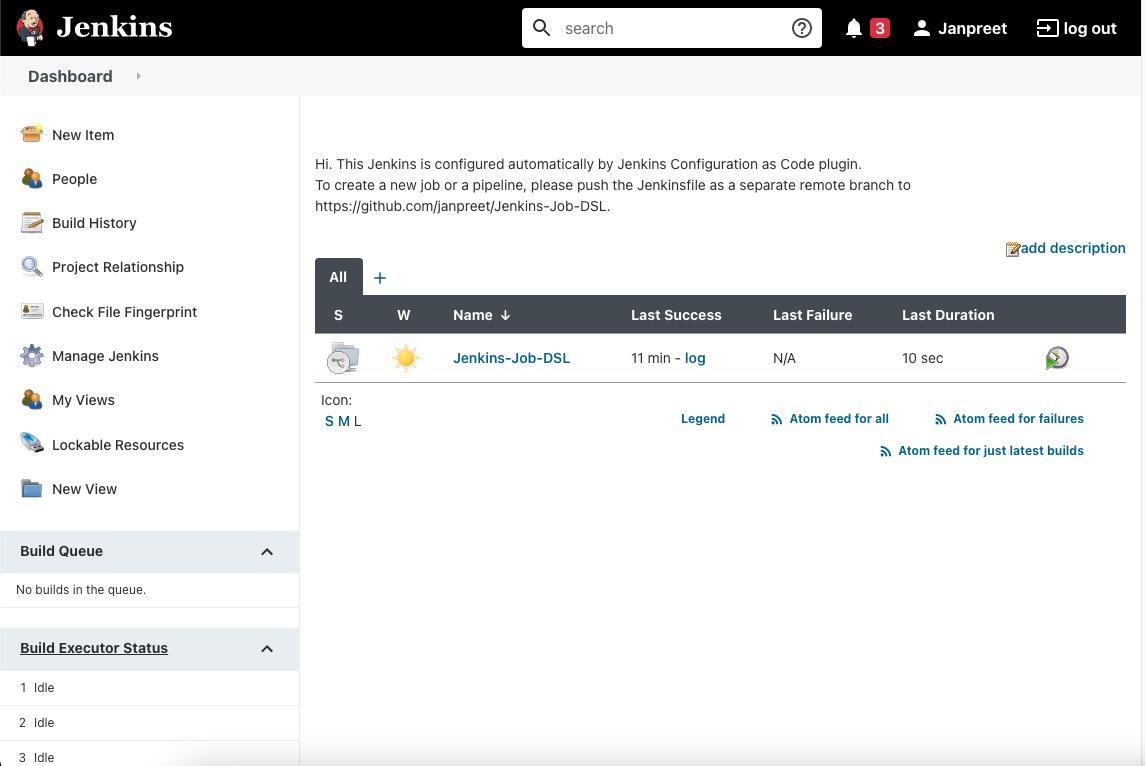
Clicking on the job will show you all the branches with a Jenkinsfile as separate pipelines.
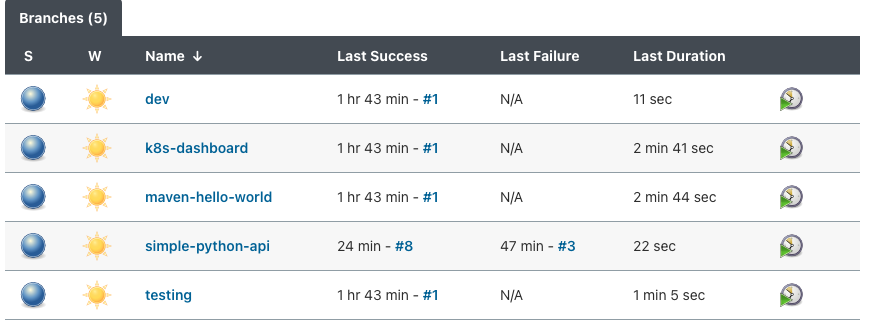
All changes to existing jobs or addition of new jobs will be changed in Jenkins-Jobs-DSL or a similar repo for your project. The idea is to codify your deployments.
Deployments
In this exercise I’ve done three kinds of deployments-
Please note that these are not the only options you can always implement an CD operator like Flux and leverage GitOps practices. Different use-cases will require different practices. I leave it open for you to decide what’s the best deployment method.
Let’s verify our deployments. Before we being please make sure you have copied the Kubeconfig generated during Terraform-GKE setup, and placed it at ~/.kube/config. It is a very important step without which you will not be able to interact with your Kubernetes cluster.
- Kubernetes Dashboard
- First copy the admin user token from the K8s Dashboard deployment by running
kubectl -n kubernetes-dashboard describe secret $(kubectl -n kubernetes-dashboard get secret | grep admin-user | awk '{print $1}') - Because the dashboard is using ClusterIP service we can only access it from within the cluster. So we’d have to use kubectl proxy to route localhost requests to the API server. Run
kubectl proxy - Now we can access Dashboard at this link. Paste the token generated in step 1 and this what you should see. Take a pause to play around and explore the dashboard, before moving on.
- First copy the admin user token from the K8s Dashboard deployment by running
- Maven Hello World
- Note that to interact with our deployment from outside the cluster we have defined a Loadlancer type service resource. To handle the external traffic, behind the scenes we are using GCP managed LoadBalancer using GKE Cloud Controller which sits between our cluster and GCP API endpoints.
# service.yaml apiVersion: v1 kind: Service metadata: annotations: meta.helm.sh/release-name: maven-hello-world meta.helm.sh/release-namespace: default creationTimestamp: "2020-12-12T15:14:30Z" finalizers: - service.kubernetes.io/load-balancer-cleanup labels: app.kubernetes.io/instance: maven-hello-world app.kubernetes.io/managed-by: Helm app.kubernetes.io/name: maven-hello-world app.kubernetes.io/version: 1.16.0 helm.sh/chart: maven-hello-world-0.1.0 name: maven-hello-world namespace: default resourceVersion: "" selfLink: /api/v1/namespaces/default/services/maven-hello-world uid: spec: clusterIP: externalTrafficPolicy: Cluster ports: - name: http nodePort: 32592 port: 8080 protocol: TCP targetPort: 8080 selector: app.kubernetes.io/instance: maven-hello-world app.kubernetes.io/name: maven-hello-world sessionAffinity: None type: LoadBalancer status: loadBalancer: ingress: - ip:- Our service would be listening to our request at port 8080 and will be routing it to the node-port 32592, to pod target-port 8080, to container port 8080 exposed by our maven-hello-world container
# Dockerfile FROM maven:adoptopenjdk AS build LABEL Maintainer="Janpreet Singh" COPY src /usr/src/app/src COPY pom.xml /usr/src/app RUN mvn -f /usr/src/app/pom.xml clean package FROM adoptopenjdk/openjdk11:alpine-jre ARG JAR_FILE=/usr/src/app/target/maven-hello-world.jar WORKDIR /opt/app COPY --from=build ${JAR_FILE} app.jar EXPOSE 8080 ENTRYPOINT ["java","-jar","app.jar"]- That means as long as we have an IP address for the LoadBalancer we can interact with Maven-Hello-World at port 8080. Let’s get the IP address by running
kubectl get svc maven-hello-world -o jsonpath='{.status.loadBalancer.ingress[0].ip}' - This is what you should see if you go to
<External-IP-Address-from-above>:8080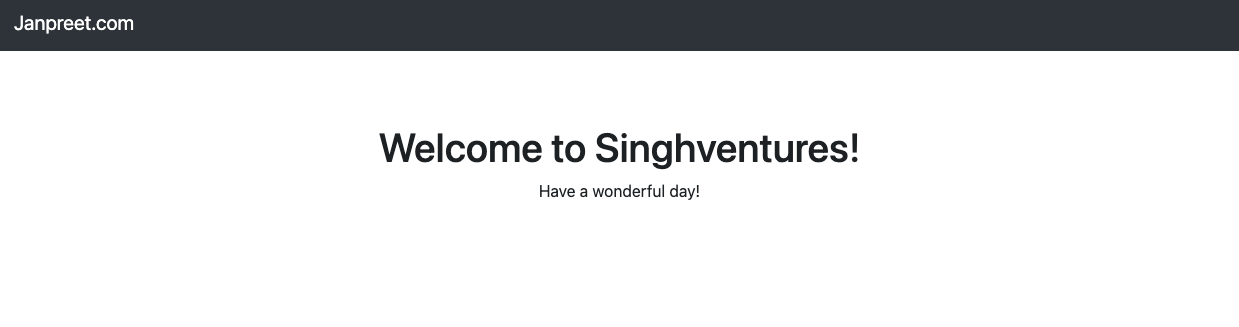
- Simple Python API
- For this deployment we are passing the following config to a Helm Package called Bare-Bones
# values.yaml replicaCount: 1 image: repository: janpreet/simple-python-api pullPolicy: Always tag: "latest" service: type: LoadBalancer port: 8080 targetPort: 5000 livenessProbe: enabled: false readinessProbe: enabled: false - This is what our install command looks like
helm install simple-python-api -f values.yaml janpreet/bare-bones - This is also using a LoadBalancer service listening at port 8080, so let’s get the external IP address by running
kubectl get svc simple-python-api-bare-bones -o jsonpath='{.status.loadBalancer.ingress[0].ip}' - This is what you should see when you go to:
<External-IP-Address-from-above>:8080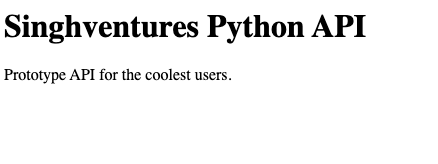
- Let’s look at the Flask URL routing
# api.py import flask from flask import request, jsonify app = flask.Flask(__name__) users = [ {'id': 1, 'name': 'Janpreet Singh', 'unique': 'DL935'}, {'id': 2, 'name': 'Second User', 'unique': 'PBX'} ] @app.route('/', methods=['GET']) def home(): return "<h1>Singhventures Python API</h1><p>Prototype API for the coolest users.</p>" @app.route('/api/v1/resources/users/all', methods=['GET']) def api_all(): return jsonify(users) - Because Flask is also mapping
/api/v1/resources/users/allto the functionapi_allwhich is using jsonify to convert our dummy list to a json string. You can also access the records added via the API by going to:<External-IP-Address-from-above>:8080/api/v1/resources/users/alland this should be your output-[{"id":1,"name":"Janpreet Singh","unique":"DL935"},{"id":2,"name":"Second User","unique":"PBX"}]
- For this deployment we are passing the following config to a Helm Package called Bare-Bones
That is the end of our deployments. Let’s do a full recap of what we’ve learned so far
- Created a Kubernetes cluster using Terraform + GCP.
- Created a VM for Jenkins using Terraform + GCP.
- Deployed Jenkins Master using JCasC as a container.
- Deployed packages to the K8s cluster using Helm and Kubectl, configured in a Jenkinsfile.
It is very important to note that all the above steps are automated. Once you create GKE and the VM using Terraform, it creates the entire pipeline for you. THe very next thing you can do is make changes to your deployments using Jenkinsfile setup in the multi-branch job.
In this exercise our pipelines are using a Docker Worker container called all-in-one which should not limit your interaction with Jenkins. I highly encourage you to make this project yours by
- Cloning repos
- Creating your own repo for Jobs and
- Creating your own Jenkinsfiles to explore more
One of the big advantages of using Jenkins Master-Worker config is to enable seamless develop-build-test-tag-publish-release pipeline. You can code your pipeline to decide which namespace should Helm install a package based on the tags which your pipeline can conditionally set. This was out of the motivation and intent of this project so I’ve not covered in this. I’ll add it in a new post to my blog.
Conclusion-
- If you must use Jenkins for K8s deployments, it makes the most sense if you deploy Jenkins inside your Kubernetes cluster so you can make the best use of a
Buildworker-agent deployed as a pod tailored to your choice of many containers. - I’ve kept the project ephemeral and avoided external storage, which is not ideal if you’re deciding to demonstrate logging.
This project has taught me a lot about the architecture of application development and release landscape.
The best part?
If you run Terraform destroy and approve the prompt, for both of your projects, it will completely destroy everything we have created in this exercise.
Do not forget to
Terraform destroyyour workspaces so you’re not using GCP resources when you don’t need to.
The next time you do a Terraform apply, it would set it up for you in the exact same order and setup, because the code is centrally organized and version controlled in GitHub. There is no reason why you can not make use of a PR-driven Atlantis to automatically apply your Terraform plan while working in a team. Look into it.
I hope this helps you learn something new. Thank you for reading.